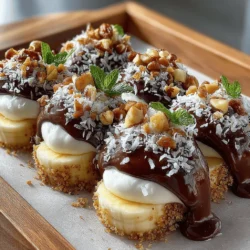
Choco-Banana Bliss Pops: A Deliciously Healthy Treat
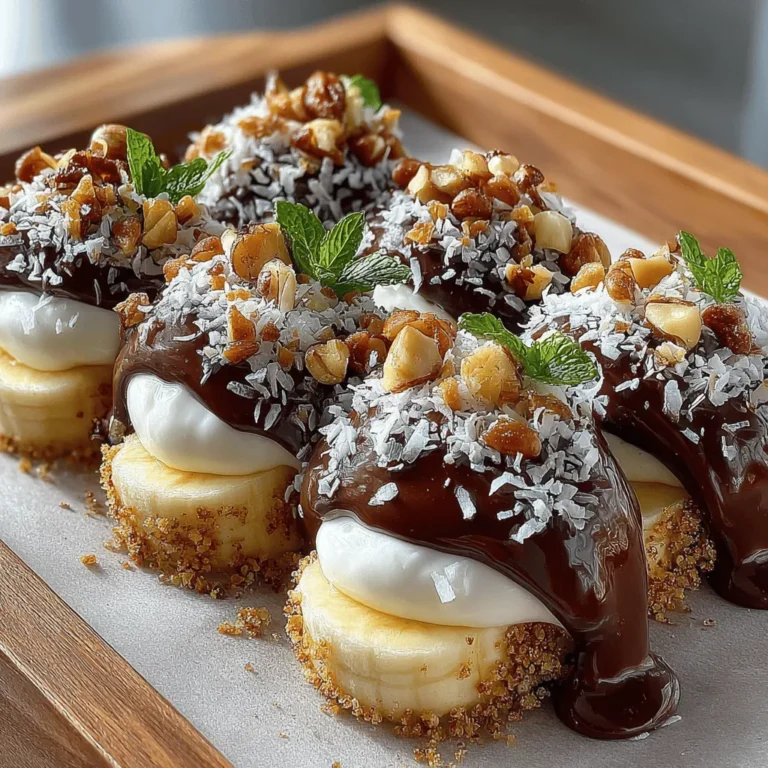
In the quest for healthy snacks that satisfy sweet cravings, the Choco-Banana Bliss Pops emerge as a delightful solution. This recipe marries the creamy texture of ripe bananas with the rich indulgence of chocolate, creating a treat that appeals to both children and adults alike. With their vibrant flavor profile and wholesome ingredients, these pops offer a guilt-free way to indulge while also being incredibly simple to prepare at home. Whether you are looking for a quick dessert for a summer gathering or a nutritious snack for the kids, Choco-Banana Bliss Pops are a perfect choice.
The Allure of Chocolate and Bananas
The combination of chocolate and bananas is a classic pairing that has delighted taste buds for generations. Their flavors complement each other beautifully; the natural sweetness of bananas enhances the deep, rich notes of chocolate, creating a harmonious blend that is hard to resist. This iconic duo is not just about taste; it also packs a nutritional punch that makes these pops a smart choice for health-conscious snackers.
Bananas, often hailed as a superfood, are rich in potassium, an essential mineral that supports heart health and helps regulate blood pressure. They are also a good source of vitamins C and B6, which contribute to overall well-being. Additionally, bananas provide dietary fiber, which aids in digestion and helps maintain a feeling of fullness, making them an excellent base for a healthy treat.
When it comes to the chocolate component, opting for dark chocolate chips elevates the nutritional value of these pops even further. Dark chocolate is known for its higher cocoa content, which means it is packed with antioxidants that can help combat free radicals in the body. It also contains less sugar compared to milk chocolate, allowing you to satisfy your sweet tooth without overwhelming your diet.
To enhance the overall health benefits of Choco-Banana Bliss Pops, we use Greek yogurt as a coating. This choice not only adds a creamy texture that helps the chocolate adhere but also infuses the pops with protein and probiotics. Greek yogurt is known for its ability to support gut health and promote a feeling of satiety, making these treats a nourishing option.
Ingredients Breakdown
To create your own Choco-Banana Bliss Pops, it’s essential to select high-quality ingredients that contribute both flavor and nutrition. Here’s a detailed breakdown of each ingredient and its role in the recipe:
– Ripe Bananas: The foundation of this recipe, ripe bananas are crucial for achieving the right balance of sweetness and creaminess. When choosing bananas, look for ones that are fully yellow with a few brown spots; this indicates they are at their peak ripeness. Overripe bananas will yield a sweeter flavor and a softer texture, which is ideal for these pops.
– Greek Yogurt: This ingredient serves as both a coating and a nutritional powerhouse. You can choose plain Greek yogurt for a tangy flavor or opt for flavored varieties for an extra hint of sweetness. The creamy texture of Greek yogurt not only helps the chocolate adhere but also adds a layer of richness that complements the bananas beautifully. Plus, the probiotics found in Greek yogurt can be beneficial for gut health.
– Dark Chocolate Chips: The star of the show, dark chocolate chips bring richness and depth to the Choco-Banana Bliss Pops. Their higher cocoa content means more antioxidants and less sugar, making them a healthier choice compared to conventional milk chocolate. When melted, dark chocolate creates a luscious coating that enhances the overall flavor experience.
– Coconut Oil: This versatile oil plays a vital role in the melting process of the chocolate. Adding coconut oil not only helps achieve a smooth, glossy finish but also contributes healthy fats that can promote heart health. The subtle coconut flavor can also add an extra layer of deliciousness to the pops.
– Chopped Nuts: Bringing a delightful crunch to the pops, chopped nuts such as almonds, walnuts, or pecans add both texture and nutrition. Nuts are rich in healthy fats, protein, and a variety of vitamins and minerals. They also provide a satisfying contrast to the creaminess of the banana and chocolate.
– Shredded Coconut: As an optional ingredient, shredded coconut can be sprinkled on top of the chocolate coating for added flavor and texture. It complements the tropical notes of the banana and adds a delightful chewiness. If you enjoy coconut, this is a fantastic way to elevate your Choco-Banana Bliss Pops.
Preparing Your Choco-Banana Bliss Pops
Now that you have a clear understanding of the ingredients and their benefits, let’s move on to the preparation steps. Making Choco-Banana Bliss Pops is not only easy but also a fun activity that can involve the whole family. Here’s how to get started:
1. Gather Your Ingredients: Before you begin, ensure that you have all the ingredients on hand. This will streamline the process and make it more enjoyable.
2. Prepare the Bananas: Start by peeling your ripe bananas and cutting them into thick slices, about 1 to 1.5 inches each. You can also use whole bananas if you prefer larger pops, but sliced bananas are more manageable for dipping and coating.
3. Melt the Chocolate: In a microwave-safe bowl, combine dark chocolate chips and a small amount of coconut oil. Microwave in 30-second intervals, stirring in between until the chocolate is completely melted and smooth. Be careful not to overheat, as chocolate can burn easily.
4. Coat the Bananas: Once the chocolate is melted, take each banana slice and dip it into the chocolate mixture, ensuring it is fully coated. You can use a fork or toothpick to help with this process, making it easier to handle.
5. Add the Toppings: After coating the banana slices in chocolate, you can roll them in chopped nuts or sprinkle shredded coconut on top for added flavor and texture. This step is entirely customizable based on your preferences.
6. Freeze the Pops: Place the coated banana slices on a parchment-lined baking sheet and freeze for at least two hours, or until the chocolate has set and the bananas are firm.
These initial steps set the stage for creating a delightful treat that not only satisfies your sweet cravings but also provides a nutritious boost. Stay tuned for the next part of the article, where we’ll delve into the finishing touches and creative variations for your Choco-Banana Bliss Pops.
{{image_2}}
Honey or Maple Syrup
When it comes to enhancing the sweetness of your Choco-Banana Bliss Pops, you have a couple of great options: honey or maple syrup. Both natural sweeteners can elevate the flavor of the yogurt coating while maintaining a healthier profile than refined sugars.
Honey
Honey is an excellent choice for those who enjoy its rich flavor. It not only adds sweetness but also brings in a hint of floral notes that can complement the bananas beautifully. However, keep in mind that honey is not suitable for vegans.
Maple Syrup
On the other hand, maple syrup offers a distinct taste with its earthy undertones. It’s a perfect alternative for those following a vegan diet. Additionally, it is lower on the glycemic index than regular sugar, making it a better option for those monitoring their blood sugar levels.
Both honey and maple syrup can be adjusted according to your taste preference. Start with a tablespoon, mix, and taste; you can always add more if you desire a sweeter flavor profile.
Step-by-Step Instructions
Preparing the Bananas
1. Selecting the Bananas: Choose ripe but firm bananas; they should be slightly yellow with some green spots. Overripe bananas can become mushy and difficult to work with.
2. Cutting the Bananas: Slice the bananas into 1-inch thick pieces. This size ensures they hold up well on the popsicle sticks and are easy to eat.
3. Inserting Popsicle Sticks: Carefully insert a popsicle stick into each banana piece. Make sure to push it in firmly but not all the way through. This will provide a sturdy handle for dipping and eating.
Making the Yogurt Coating
1. Choosing Your Yogurt: Opt for plain Greek yogurt for a thicker consistency, or use a dairy-free alternative if you prefer. For added flavor, consider using vanilla-flavored yogurt.
2. Mixing in Sweetener: In a mixing bowl, combine the yogurt with your choice of honey or maple syrup. Stir until fully incorporated. If you like, you can also add a pinch of cinnamon or vanilla extract for an extra flavor boost.
Coating the Bananas
1. Dipping Technique: Place the prepared banana pieces on a parchment-lined baking sheet. Using a spoon or spatula, generously coat each banana piece in the yogurt mixture.
2. Preventing Drips: To avoid excess yogurt from dripping off, ensure the coating is thick enough. A quick shake after dipping can help remove any excess.
Freezing for Firmness
1. Initial Freeze: Once all banana pieces are coated, place the baking sheet in the freezer for about 30 minutes. This step is crucial; it helps the yogurt coating firm up before the chocolate dip.
Melting the Chocolate
1. Choosing Your Chocolate: Use high-quality dark chocolate for a rich flavor. You can also use semi-sweet or milk chocolate, depending on your preference.
2. Melting Method: The best way to melt chocolate is using a double boiler. Fill a pot with water and place a heatproof bowl on top, ensuring it doesn’t touch the water. Heat gently until the chocolate is completely melted, stirring occasionally. Alternatively, you can microwave the chocolate in short bursts of 15 seconds, stirring in between to prevent burning.
Preparing the Coating Mixture
1. Nuts and Coconut: For the coating, consider finely chopping nuts like almonds, walnuts, or pecans. Unsweetened shredded coconut can also add a tropical twist. Mix your chosen nuts and coconut in a bowl for easy access during the dipping process.
Dipping and Decorating
1. Dipping in Chocolate: Once the yogurt coating is set, remove the banana pops from the freezer. Dip each pop into the melted chocolate, ensuring it is fully coated. Allow any excess chocolate to drip off before moving to the next step.
2. Adding Toppings: Immediately sprinkle your nut and coconut mixture over the chocolate-covered bananas for decoration. This step is essential as the chocolate will harden quickly.
Final Freeze
1. Setting the Chocolate: Place the coated banana pops back onto the parchment-lined baking sheet and freeze for an additional 1-2 hours. This final freeze ensures that the chocolate shell is firm and ready for serving.
Serving Suggestions
Choco-Banana Bliss Pops can be presented in various creative ways to enhance their appeal. Here are a few ideas:
– On a Stick: Serve them directly on popsicle sticks for a fun, easy-to-eat treat.
– Chocolate Drizzle: For an extra touch, drizzle some more melted chocolate over the finished pops before serving.
– Garnishing: Sprinkle some additional chopped nuts or coconut on top for a decorative touch.
– Accompaniments: Pair with a fresh berry sauce or a scoop of yogurt for a delightful dessert platter.
– Themed Presentation: For parties, consider using colorful cups or containers to hold the pops, making them visually appealing.
Nutritional Information
Each serving of Choco-Banana Bliss Pops (1 pop) contains approximately:
– Calories: 120
– Protein: 3g
– Fat: 6g
– Carbohydrates: 16g
– Fiber: 2g
– Sugar: 9g
These pops are a nutritious option, offering a good balance of carbohydrates, healthy fats, and protein. The bananas provide natural sweetness and potassium, while the yogurt adds beneficial probiotics.
Incorporating Choco-Banana Bliss Pops into your diet can be a satisfying way to indulge your sweet tooth without the guilt. They serve as a healthier dessert alternative, making them perfect for families, kids, or anyone looking to enjoy a sweet treat while still being mindful of their nutritional intake.
Conclusion
Choco-Banana Bliss Pops are a delightful blend of taste and health, making them an excellent choice for a homemade snack or dessert. With their creamy yogurt coating, rich chocolate dip, and the natural sweetness of bananas, they offer a satisfying treat that’s easy to prepare.
Not only are these treats delicious, but they also allow for creativity in the kitchen. You can customize them according to your taste preferences by experimenting with different toppings or even changing the yogurt flavor.
Encouraging family and friends to join in the fun of making these pops can also enhance the experience, turning it into a fun kitchen activity. The joy of enjoying a homemade treat that is both nutritious and indulgent is truly unmatched.
So why not try your hand at making Choco-Banana Bliss Pops? Share your creations and experiences with friends and family, and enjoy the delicious rewards of your culinary efforts!


