
Heavenly Maple Glazed Cinnamon Rolls: A Comfort Food Classic
There’s something undeniably comforting about the aroma of freshly baked cinnamon rolls wafting through your home. This delightful treat, often associated with lazy Sunday mornings and family gatherings, is a staple of comfort food that brings warmth and joy. The combination of soft, pillowy dough swirled with a rich cinnamon-sugar filling and topped with a luscious maple glaze is nothing short of heavenly. It’s a recipe that promises not just satisfaction but also a sense of accomplishment, as you create something special from scratch.
Cinnamon rolls have a long-standing tradition in many cultures, often enjoyed as a sweet breakfast or indulgent snack. Their popularity can be attributed to their versatility and the ease with which they can be made at home. Unlike store-bought versions, homemade cinnamon rolls allow you to control the ingredients, ensuring fresh, wholesome flavors with every bite. In this guide, we will explore the delightful process of making Heavenly Maple Glazed Cinnamon Rolls, a recipe that is bound to become a cherished family favorite.
Understanding the Ingredients
To achieve the perfect cinnamon roll, it’s essential to understand the role of each ingredient. The magic lies in the combination of simple components that work together to create a deliciously indulgent treat.
Dough Ingredients
The foundation of any great cinnamon roll is the dough, which requires a few key ingredients:
– All-Purpose Flour: This is the primary ingredient that gives the rolls structure. A good quality all-purpose flour will ensure your rolls rise beautifully and have the desired fluffy texture.
– Yeast: Yeast is the leavening agent that allows the dough to rise. Active dry yeast is commonly used in cinnamon roll recipes, and it’s crucial for achieving that light and airy texture.
– Sugar: Not only does sugar sweeten the dough, but it also feeds the yeast, helping it to activate and rise. This results in a softer and more flavorful roll.
– Butter: Melted butter adds richness to the dough, contributing to its tender crumb and delicious flavor. It also enhances the overall mouthfeel, making each bite a little bit more luxurious.
Cinnamon Filling Ingredients
The filling of your cinnamon rolls is where the magic truly happens. This is what transforms a simple roll into a flavorful experience:
– Brown Sugar: Using brown sugar in the filling adds a deep, molasses-like flavor that pairs beautifully with the warm spice of cinnamon. It also helps to create a gooey texture that clings to the roll.
– Cinnamon: The star of the filling, cinnamon adds warmth and a comforting aroma that is synonymous with cinnamon rolls. The type of cinnamon you choose can subtly affect the flavor—Ceylon cinnamon is often considered the “true” cinnamon, while Cassia cinnamon is more commonly used in baking.
Maple Glaze Ingredients
Finally, the pièce de résistance of these cinnamon rolls is the maple glaze, which adds a sweet, glossy finish:
– Powdered Sugar: This is the base of the glaze, providing sweetness and a smooth texture. It dissolves easily, creating a creamy consistency when mixed with liquid.
– Pure Maple Syrup: Using pure maple syrup elevates the glaze, adding depth of flavor and a hint of natural sweetness that complements the cinnamon rolls perfectly. Avoid imitation syrups, as they lack the rich flavor that pure syrup provides.
– Milk or Cream: This ingredient is necessary to achieve the desired pourable consistency for the glaze. The choice between milk or cream will depend on how rich you want the glaze to be.
Step-by-Step Preparation of the Dough
Now that you understand the ingredients that make these cinnamon rolls so delightful, let’s dive into the preparation of the dough. Making cinnamon roll dough is a straightforward process, and with a few simple steps, you’ll have a soft and pliable dough ready for filling.
Mixing the Dry Ingredients
Start by gathering your dry ingredients: all-purpose flour, yeast, sugar, and salt. In a large mixing bowl, combine these ingredients thoroughly. Mixing the dry components well is essential, as it ensures that the yeast is evenly distributed throughout the flour, allowing for consistent rising. Salt is also an important player here, as it balances the sweetness and enhances the overall flavor of the dough.
Combining Wet Ingredients
Next, it’s time to incorporate the wet ingredients. Warm some milk (about 110°F) and melt your butter. The warmth of the milk is crucial, as it helps activate the yeast, allowing it to bloom properly. Add the melted butter to the warm milk and mix well. Then, pour this mixture into your bowl of dry ingredients. Using a spatula or wooden spoon, gently combine the ingredients until a shaggy dough begins to form.
Kneading the Dough
Once the dough is combined, it’s time to knead. Transfer the dough to a lightly floured surface and begin kneading by pushing it away with the heel of your hand, then folding it back over itself. Continue this process for about 8-10 minutes, or until the dough is smooth and elastic. The goal here is to develop the gluten, which will give your cinnamon rolls their desirable chewy texture. A well-kneaded dough should spring back when poked and should not be overly sticky.
Letting the Dough Rise
After kneading, shape your dough into a ball and place it in a lightly greased bowl, covering it with a clean kitchen towel or plastic wrap. The dough needs a warm environment to rise effectively; an ideal temperature is around 75-85°F. If your kitchen is cool, you can create a warm spot by placing the bowl in an oven that has been preheated to 200°F for just a few minutes, then turned off. Allow the dough to rise until it has doubled in size, which typically takes about 1 to 1.5 hours.
Creating the Cinnamon Filling
While the dough is rising, you can prepare the cinnamon filling, which is a crucial step in achieving that iconic flavor profile.
Mixing the Filling Ingredients
In a small bowl, combine your brown sugar and cinnamon. The ratio of cinnamon to sugar can be adjusted according to your taste preferences—more cinnamon for a spicier kick or more sugar for a sweeter filling. Mix the two ingredients until they are well blended, ensuring that the cinnamon is evenly distributed throughout the sugar.
Rolling Out the Dough
Once the dough has risen, it’s time to roll it out. Gently punch down the dough to release any air bubbles and turn it out onto a lightly floured surface. Using a rolling pin, roll the dough into a large rectangle, about 1/4 inch thick. The size of your rectangle will determine how thick your cinnamon rolls will be, so adjust accordingly.
Take care to roll the dough evenly to ensure an even distribution of the filling. Once the dough is rolled out, sprinkle the cinnamon-sugar mixture evenly over the surface, leaving a small border around the edges to prevent the filling from spilling out when you roll it up.
This initial stage of preparation sets the tone for what’s to come—a batch of Heavenly Maple Glazed Cinnamon Rolls that will delight your taste buds and fill your home with irresistible aromas. Stay tuned for the next steps where we will roll up the dough, cut it into perfect spirals, and prepare to bake these delicious treats to golden perfection.
{{image_2}}
Rolling and Cutting the Cinnamon Rolls
Once your dough has risen and is ready to be transformed into mouthwatering cinnamon rolls, the next step is crucial: rolling and cutting. This process not only defines the structure of your rolls but also impacts their texture and overall presentation.
Tight Rolling Technique
Achieving a tightly rolled cinnamon roll is essential for creating a fluffy texture and ensuring that the filling is evenly distributed throughout the roll. Begin by lightly flouring your work surface to prevent sticking. Roll out your dough into a rectangle, ideally about 12×18 inches. When you start rolling, ensure that you begin from one of the longer sides of the rectangle. Using your hands, gently tuck the dough under as you roll, applying even pressure. The goal is to create a compact roll that holds together well during baking.
A tight roll helps to maintain the shape of the rolls and prevents them from unraveling in the oven. If you find that the dough is resisting, let it rest for a few minutes before continuing; this allows the gluten to relax, making it easier to roll. Once you reach the end of the rectangle, pinch the seam to seal it well.
Cutting the Rolls
Now that your dough is rolled tightly, it’s time to cut it into individual rolls. Using a sharp knife or a bench scraper, cut the rolled dough into 12 equal pieces, approximately 1.5 inches thick. For the best results, avoid using a sawing motion; instead, apply gentle pressure straight down to ensure clean cuts. This technique will prevent the rolls from squishing and losing their shape.
For uniformity, you can also use dental floss for cutting. Simply slide a length of floss underneath the roll, cross the ends over the top, and pull quickly to cut through the dough. This method is especially effective for achieving even, clean cuts without compressing the dough.
Baking the Cinnamon Rolls
With your rolls cut and ready to go, it’s time to bake them to golden perfection.
Preheating the Oven
Preheating your oven is one of the most critical steps in baking. Ensure your oven is set to 375°F (190°C) and allow it to fully preheat before placing your cinnamon rolls inside. This helps to create a consistent temperature, ensuring that the rolls rise properly and develop that beautiful golden-brown crust. An oven thermometer can be a useful tool to verify that your oven maintains the correct temperature.
Baking Time and Indicators
Once your rolls are in the oven, they will need to bake for approximately 25-30 minutes. Keep an eye on them as they bake; the ideal cinnamon rolls should turn a light golden brown, and the edges should be slightly firm to the touch. To test for doneness, gently press the top of one roll; it should spring back without leaving an indentation. The internal temperature should reach around 190°F (88°C) when fully baked.
After baking, let the rolls cool in the pan for about 10 minutes before applying the glaze. This brief cooling period allows the rolls to set and makes it easier to remove them from the pan without falling apart.
Preparing the Maple Glaze
The finishing touch on your cinnamon rolls is the heavenly maple glaze, which adds a delightful sweetness and enhances the overall flavor.
Whisking Ingredients
To create the perfect glaze, you’ll need powdered sugar, maple syrup, and a splash of milk or cream. In a mixing bowl, combine 1 cup of powdered sugar with 2-3 tablespoons of maple syrup. Begin whisking together, adding milk a tablespoon at a time until you achieve your desired consistency. For a thicker glaze, use less milk; for a drizzleable glaze, add more until it flows smoothly from the whisk.
Whisking is essential here, as it incorporates air into the glaze, giving it a light texture. Make sure there are no lumps for a smooth finish.
Adjusting for Preference
Feel free to adjust the glaze to suit your taste. For a stronger maple flavor, increase the amount of maple syrup, or consider adding a pinch of salt to balance the sweetness. If you prefer a hint of vanilla, a few drops of pure vanilla extract can elevate the flavor profile even further.
Glazing and Serving the Rolls
After your cinnamon rolls are baked and cooled slightly, it’s time to glaze and serve them!
Timing for Glazing
For maximum flavor absorption, glaze your cinnamon rolls while they are still warm. This allows the glaze to seep into the crevices of the rolls, enhancing each bite with that rich maple flavor. Use a spoon or a small whisk to drizzle the glaze generously over the top of each roll. Don’t be shy—let it pool in the center and dribble down the sides for an enticing presentation.
Presentation Ideas
When it comes to serving, presentation can elevate your cinnamon rolls from delightful to spectacular. Consider placing the rolls on a decorative platter lined with parchment paper. You can add a sprinkle of chopped nuts or a dusting of additional powdered sugar for visual appeal.
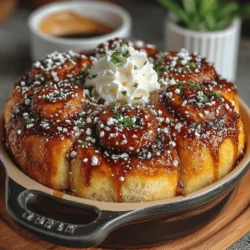
For a touch of elegance, garnish with fresh herbs like mint or a sprinkle of cinnamon for an aromatic finish. Pair your cinnamon rolls with a hot cup of coffee or tea for a cozy experience. They also make for a lovely brunch centerpiece, perfect for sharing with family and friends.
Conclusion
Homemade cinnamon rolls, especially with a heavenly maple glaze, are a labor of love that brings joy not only to those who bake them but also to those who share in the delightful experience. The tight rolling technique ensures a soft, fluffy texture while the baking process creates the perfect crust.
The rich, warm maple glaze adds an irresistible sweetness that makes every bite a little piece of heaven. Whether enjoyed for breakfast, brunch, or as a special treat, these cinnamon rolls are bound to become a cherished recipe in your home.
As you gather around the table with loved ones, savor the comfort of homemade baking and the joy it brings. Encourage your family and friends to indulge in this delectable delight, celebrating the sweetness of life one roll at a time. Enjoy the process, and happy baking!